minimum viable reflow oven
So: I totally stole the idea for this thing from all over the place. There are dozens of tutorials about how to build a reflow oven with a toaster oven. By far the coolest is the Halogen Lamp reflow with low-temp solder paste, but assuming you only have regular paste, what I’ve done will also work. Note: I’m moving to the low temp stuff for future builds because it’s faster and easier to work with.

First, supplies: You’ll need a toaster oven. I ordered one from the big river , but anything that’s functioning and has both top and bottom elements should work just fine. Don’t use it for food afterwards; not only is the metal in solder toxic, but the fumes from the flux are also not great. There’s probably an MSDS around somewhere, possibly from wherever you can buy solder paste, that describes the precautions you should take.
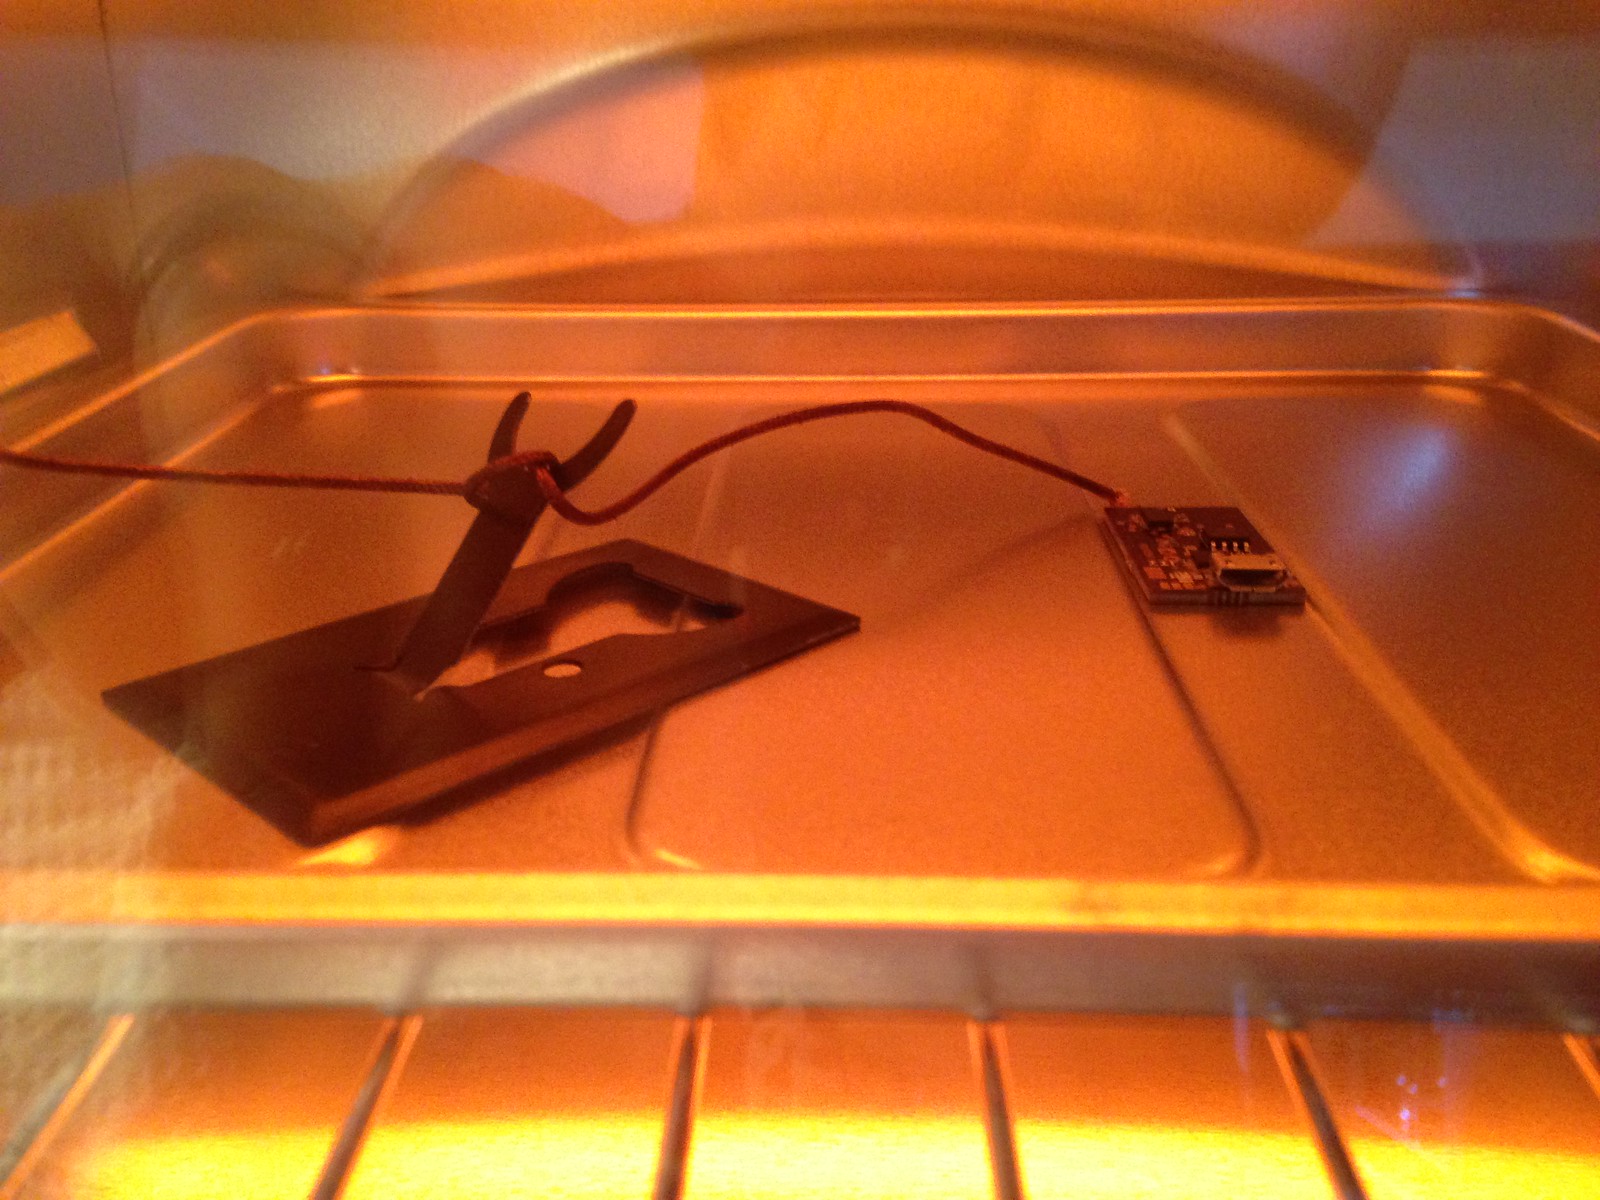
Second, you’ll need some way of measuring the temperature inside the oven accurately. I got a thermocouple and an amp from adafruit, but you could also hack a kitchen thermometer. They’re less accurate, but cheaper. I went for accuracy here.
Third, you’ll need some way of turning the power off and on. Some people have observed that toaster ovens have perfectly good knobs on the front, and you can get away with just turning it off and on that way. I’m lazy, and I have a short attention span, so I got a powerswitch tail. It’s a pretty nifty isolated relay; it connects to a digital pin, and when you bring it high, it turns on the power.
Lastly, you’ll need a microcontroller of some sort. I used a Spark core, because it was on hand and easy to program. I didn’t even change the firmware. I used the tinker firmware and some ruby code to talk to the spark API. I could have used a raspberry pi, an arduino, whatever; the requirements for this project are super minimal. Really, you need about one-second resolution on the thermocouple, and the same on the power. My code is here: https://gist.github.com/mattmills/746bc1e8fed75ea413ae (note that I’ve taken out my access tokens). Note that the values for temperature are probably unique to my oven and room temperature; if you make one of these, definitely do a test run.

Assembly: I didn’t even bother with a permanent board. The Spark core is dead useful, and I don’t want it tied up in one device. I stuck it in a breadboard, wired up the amp to power and an analog pin. Wired the powertail’s control lines to a digital pin and ground, and plugged everything in. I ran the code once, tuned when to stop heating for both stages, and then ran it again. The curve was in the bounds of workable, so I put in a test board, and it worked :)
Posted by Matt on 2014-08-11 02:43:08 +0000